Both the above error’s doesn’t let you install drivers for your NVIDIA Graphic Card; hence you are stuck with this annoying error. Moreover, the error code doesn’t include the tiniest bit of information, making it more difficult to troubleshoot this issue. But this is what we do; hence we have put together a compressive guide to help you solve this problem.
[SOLVED] NVIDIA Installer Cannot Continue Error
It’s recommended to create a System Restore Point before making any changes in your System.
[SOLVED] NVIDIA Installer Cannot Continue Error Method 1: Enable Graphics card and manually try to update Drivers Method 2: Manually Download NVIDIA Graphic Driver Method 3: Manually add Device ID in INF setup file Method 4: Uninstall NVIDIA
So without wasting any time let’s see How to Fix NVIDIA Installer Cannot Continue Error.
Method 1: Enable Graphics card and manually try to update Drivers
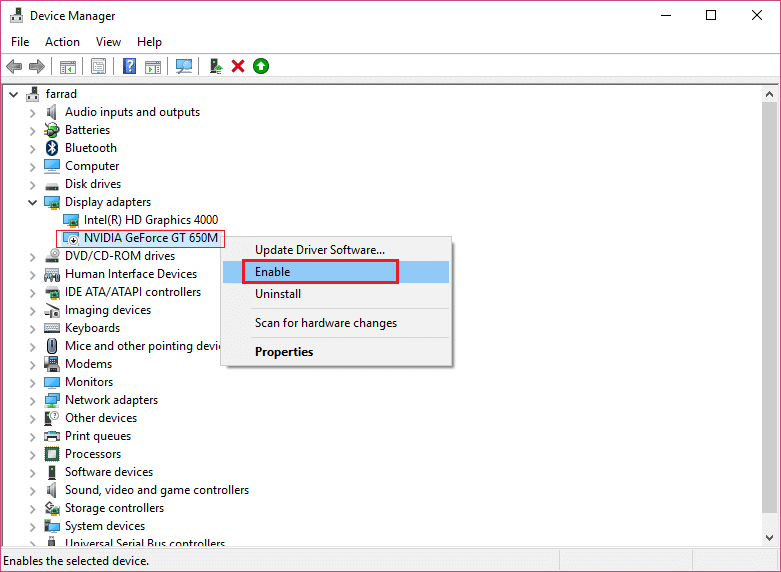
Press Windows Key + R then type devmgmt.msc and hit Enter to open Device Manager.
Next, expand Display adapters and right-click on your NVIDIA Graphic Card and select Enable.
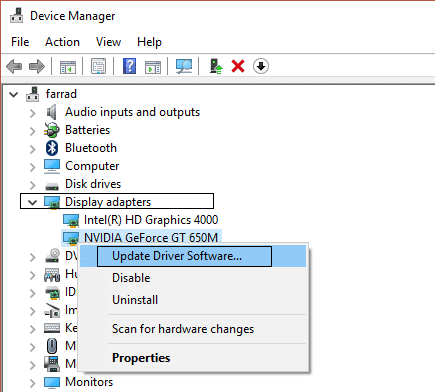
Once you have done this again, right-click on your graphic card and select “Update Driver Software.”
Select “Search automatically for updated driver software” and let it finish the process.
If the above step could fix your problem, then very good, if not then continue.
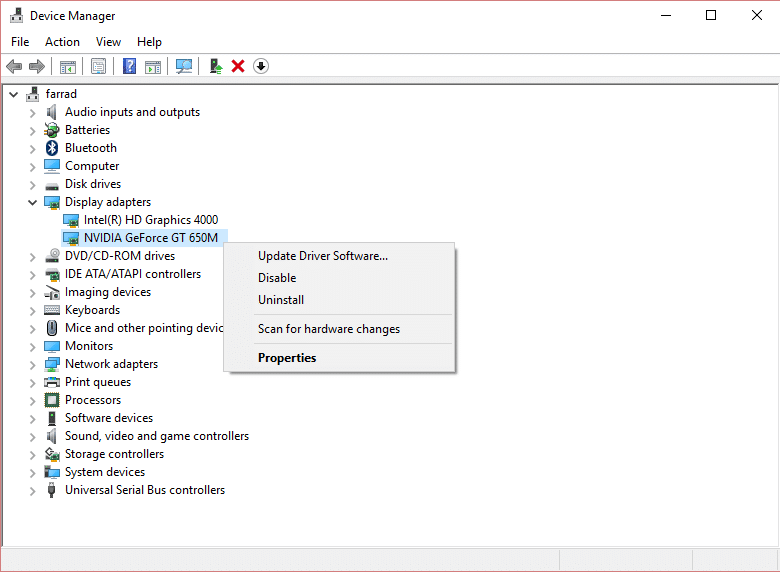
Again select “Update Driver Software“ but this time on the next screen select “Browse my computer for driver software.”
Now select “Let me pick from a list of device drivers on my computer.”
Finally, select the compatible driver from the list for your NVIDIA Graphic Card and click Next.
Let the above process finish and restart your PC to save changes. After updating Graphic card, you may be able to Fix NVIDIA Installer Cannot Continue Error.
Method 2: Manually Download NVIDIA Graphic Driver
To Manually download NVIDIA Graphic Card Driver go to this article here, How to manually update Nvidia driver if GeForce Experience is not working.
Method 3: Manually add Device ID in INF setup file
Press Windows Key + R then type devmgmt.msc and hit enter to open Device Manager.
Expand Display adapter and right-click on your NVIDIA Graphic Card device & select Properties.
Next, switch to Details tab and from the dropdown under Property select “Device instance path.”
You will see something like this: PCI\VEN_10DE&DEV_0FD1&SUBSYS_05781028&REV_A1\4&274689E5&0&0008 5.The above has all the details about your Graphics Card, for example, Manufacturer’s details, chipset, and model etc.
Now the VEN_10DE tells me the Vender Id is 10DE which is the vendor ID for NVIDIA, DEV_0FD1 tells me the Device Id is 0FD1 is NVIDIA Graphic Card GT 650M. If you want to deduce the above, go to the bottom and type your vendor ID in Jump box, once all the devices of the vendor load up again go to the bottom and type your Device ID in the jump box. Voila, now you know the manufacturer and graphic card number.
I guess manually installing the driver would have given the error “This graphics driver could not find compatible graphics hardware” but don’t Panic.
Navigate to the NVIDIA install directory:
The above folder contains many INF files, including these: Note: First create a backup copy of all the inf file.
Now pick any one of the above and then open it in the text editor.
Scroll down until you see something like this:
Now carefully scroll down to the section similar to your vendor id and device id (or same).
Now repeat the above process until you can’t find a similar match in all of the above files. 15.Once you have found the similar section then try to create a matching key, for example: In my case, my device instance path was: PCI\VEN_10DE&DEV_0FD1&SUBSYS_05781028 So the key will be %NVIDIA_DEV.0FD1.0566.1028% = Section029, PCI\VEN_10DE&DEV_0FD1&SUBSYS_05781028
Insert it in the section, and it will look like:
NOW SCROLL DOWN to the [Strings] section it will look like this:
Now add a line in for your Video card.
Save the file then go back and again run the Setup.exe from the following path: C:\NVIDIA\DisplayDriver\355.82\Win10_64\International
The above method is lengthy, but in most cases, people were able to Fix NVIDIA Installer Cannot Continue Error.
Method 4: Uninstall NVIDIA
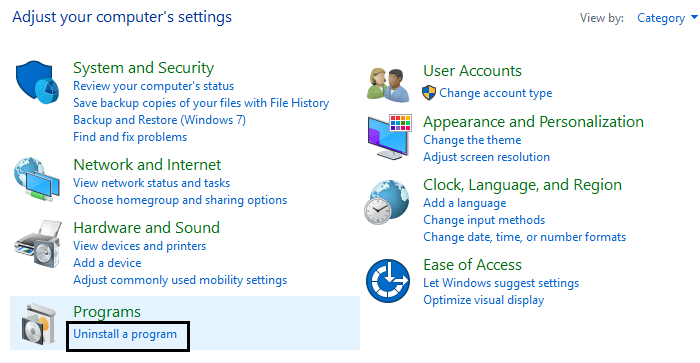
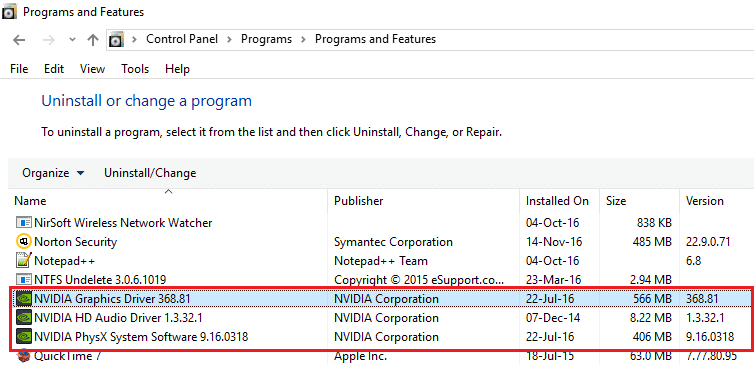
Press Windows Key + X then select Control Panel.
From Control Panel, click on Uninstall a Program.
Next, uninstall everything related to Nvidia.
Reboot your system to save changes and again download the setup.
Once you are sure that you have removed everything, try installing the drivers again. The setup should work without any problems. That’s it you have successfully Fix NVIDIA Installer Cannot Continue Error but if you still have any question regarding this post feel free to ask them in the comment’s section.