Have you ever wondered why and how this happens? The answer: All devices have a memory called cache memory. This memory stores all the details of data used or downloaded from the Internet. So, when you start downloading, all the information is stored in the cache memory. That’s why when your download stops due to some error, it starts to download right from it left off the last time.
How to Clear All Type of Cache in Windows 10
What is Cache?
A cache is a software or hardware that is used to store data and information, temporarily in a computer environment. It is frequently used by cache clients, such as CPU, applications, web browsers or operating systems.
How to Clear All Type of Cache in Windows 10 What is Cache? Advantages of Cache Disadvantages of Cache 13 Easy Steps to Clear Cache in Windows 10 Method 1: Desktop Apps Cache 1. Clear using Via Ccleaner 2.Clear Cache Through Disk Clean-up Method 2: File Explorer History Method 3: Internet Explorer Cache Method 4: Clear Microsoft Edge Cache Method 5: Clear Windows 10 Store Cache Method 6: Delete the Location History Method 7: Clear Clipboard Data Method 8: Delete Temporary Files Method 9: Delete Diagnostic Data Method 10: Delete Prefetch Files Method 11: Clear DNS Cache Method 12: Windows Update Cache Method 13: System Restore Cache
Advantages of Cache
Reduces data access time, makes the system faster and more responsive. Reduces latency, results in higher performance of system and applications. Improves I/O by diverting I/O to cache Reduces I/O operations to external storage. Maintains consistency and integrity of data.
Disadvantages of Cache
A chance of slow process execution, in case of low memory Excess memory use can lead to lags. Your PC might also hang once in a while. There is a chance that the cache gets corrupted or damaged. Starting a PC might take longer than usual.
So, to keep all this in check, it is essential to clear the cache once in a while. Cleaning the cache allows your PC to run with ease, without causing any problem.
13 Easy Steps to Clear Cache in Windows 10
In Windows 10, many types of cache exist, such as
Desktop App Cache. File Explorer Cache. Internet Explorer Cache. Windows 10 store Cache. Temporary files Cache, and more.
You can find them on Internet Explorer, File Explorer History, Windows store cache, Location History, and many other places. Let’s now talk about the main point: how to clear cache in Windows 10!
Method 1: Desktop Apps Cache
1. Clear using Via Ccleaner
You can clear cache easily by using Ccleaner software which is free of cost and can clear caches like browser caches, thumbnails cache, DNS cache and many more just at one click. To do so follow the below steps: 1.Visit ccleaner.com and click on Download Free Version.
2.Click on the free download button and your download will start.
3.Once the download is complete, double-click on the setup file. The Below box will appear.
4.When the setup wizard starts, click on Install.
5.Once the installation is complete, click on Run Ccleaner.
6.You’ll see a list of files on the left side under Cleaner section. Select the file you want to clean and click on Run Cleaner to clean all those files.
After successfully running, all your selected files will be cleared, including the Windows 10 cache.
2.Clear Cache Through Disk Clean-up
If you do not want to install any third-party app to clean your PC then you can clean it manually using the Disk Clean up. It is pure manual method to instantly clear temp files, thumbnails and all types of cache. To clean cache using Disk Clean-up follow below steps: 1.Search cleanmgr using the search box and Disk clean-up will appear on top of the search.
2.Hit the enter button on Keyboard. Select drive you want to clean and click OK.
3.Check all the boxes available and click on “Clean up system files”.
After some time when the process will complete, all your files will be cleared. If you’re unable to clear the cache using this method then use this advanced disk cleanup.
Method 2: File Explorer History
When you browse or open different files using the File Explorer, it generates a lot of cache files which needs to be cleared. To remove the Cache of file explorer history, follow below steps: 1.Click File Explorer icon available on Taskbar.
2.Click on View available at the top.
3.Click on the Options available at the top right corner of the ribbon.
4.Below box will appear. Click on the Clear button at the bottom.
After completing the above steps, your File Explorer history will successfully be cleared.
Method 3: Internet Explorer Cache
When you open any website or download or save something, all the information will store into internet explorer cache which needs to be clear when no longer needed. To do so follow the below steps: 1.Click on the Internet Explorer icon available on Desktop or search for it using the search bar.
2.Click on Tools available at top right corner.
3.Click on the Internet Options.
4.Under General tab, click on Delete button.
5.Check all the boxes available in the appeared box and again click on Delete.
After completing all the above steps, all your Internet explorer cache will be cleared.
Method 4: Clear Microsoft Edge Cache
Like Internet Explorer, Microsoft Edge also stores cache which also needs to be cleared regularly to optimize system performance. To clear Microsoft Edge Cache, follow the below steps: 1.Open Microsoft Edge and click on three dots icon available at top right corner.
2.Click on Settings from the Microsoft Edge Menu.
3.Click on Choose what to clear button.
4.Check all the boxes against the files you want to clear and click on the Ok button.
After completing the above steps, selected Microsoft edge cache will be cleared.
Method 5: Clear Windows 10 Store Cache
Windows Store or Microsoft Store was introduced in Windows 10, which evidently also stores a large amount of cache. So, to keep your system work efficiently you need to clear Windows store cache from time to time. To clear the cache of Windows store, follow the below steps: 1.Open run dialog box by clicking Windows key +R.
2.Write command WSReset.exe under Rin dialog box and click Ok.
After performing the above steps, your Windows store will be cleared and it will reset.
Method 6: Delete the Location History
Windows 10 stores Location History cache which needs to be cleared. To clear Location History, follow the below steps: 1.Press Windows Key + I to open Settings then click on Privacy.
2.Click on Location from the left-hand window pane.
3.Under Location History, click on the Clear button.
After completing the above steps, your Location History cache will be cleared.
Method 7: Clear Clipboard Data
All the data like images, files, document, etc for which you use cut or copy function are first stored on the clipboard and remains there in the history until it’s cleared. So, if you want to delete all the cache from your PC you need to delete the cache or the clipboard history. 1.Press Windows Key + I to open Settings then click on System.
2.Click on Clipboard available at the left-hand side menu.
3.Under Clear clipboard data, click on Clear button which will clear all the data available in the clipboard.
If the above method doesn’t work for you then you can also clear the clipboard history using the command prompt.
Method 8: Delete Temporary Files
When you perform different tasks on PC, a large number of files are created such as thumbnails, temporary internet files, error reporting files, delivery optimization files. etc. All these files are stored under cache and need to be deleted from time to time to maintain the efficiency of the system. To delete temporary & cache files, follow the below steps: 1.Type storage using the Windows Search Bar available under Taskbar.
2.Hit the Enter button on the keyboard. The Below screen will appear.
3.Click on This PC (C:).
4.Click on Temporary Files.
5.Check the box against the files you want to remove and click on Remove files button.
An alternate method to Delete Cache Files 1.Open run dialog box by clicking Windows key + R.
2.On command prompt type the command %temp% and click on Ok.
3.Under the Temp folder, delete all the files & folders.
4.Again open run, and now type “temp” in the command box and click OK.
5.Again delete all the files & folders available in this folder.
After completing the above steps, all your temporary files will be deleted.
Method 9: Delete Diagnostic Data
When any error occurs on your PC, Microsoft collects the Diagnostic data related to that error and stores it. So in order to completely clear all the cache from your PC, you need to clear the diagnostic data also. 1.Press Windows Key + I to open Settings then click on Privacy.
2.Click on Diagnostics & feedback available under the left-hand window pane.
3.Under Delete diagnostic data, click on the Delete button and all your diagnostic data will be cleared.
Method 10: Delete Prefetch Files
To clear cache you should also delete all Prefetch files. To do so, follow the below steps: 1.Open run dialog box using Windows key +R.
2.Write command prefetch under the Run dialog box and click OK.
3.Delete all the files under the Prefetch folder and all your prefetch data will be cleared. You can also disable Prefetch completely if you don’t want to store its data.
Method 11: Clear DNS Cache
Whenever you visit any website, your browser first goes to DNS to look for the local address of that website. DNS also store some cache to keep track of which addresses are being searched. So, if you want to clear all the cache of the system then you need to clear DNS cache also. To clear DNS cache, follow below steps: 1.Search for command prompt using the search bar or by typing cmd. Hit the Enter button on the keyboard.
2.Below command prompt will appear.
3.Type command “ ipconfig/flushDNS ” and press enter.
This will clear your DNS cache.
Method 12: Windows Update Cache
Windows 10 release its update from time to time and no matter how much you avoid updating Windows, at some point of time it becomes necessary to update your PC. And when you update your Windows, the cache is also stored. To clear Windows update cache, follow below steps: 1.Press Windows Key + X then select Command Prompt (Admin).
2.Now type the following commands to stop Windows Update Services and then hit Enter after each one: net stop wuauserv net stop cryptSvc net stop bits net stop msiserver
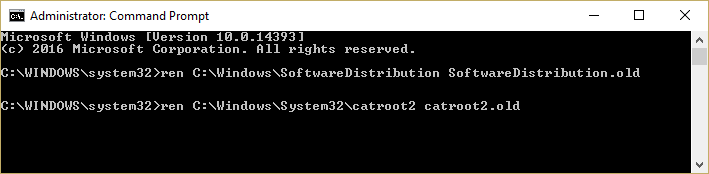
3.Next, type the following command to rename SoftwareDistribution Folder and then hit Enter: ren C:\Windows\SoftwareDistribution SoftwareDistribution.old ren C:\Windows\System32\catroot2 catroot2.old
4.Finally, type the following command to start Windows Update Services and hit Enter after each one: net start wuauserv net start cryptSvc net start bits net start msiserver
5.Reboot your PC to save changes and check if you are able to Fix Windows 10 Updates extremely slow issue. If you are still not able to download the updates then you need to delete SoftwareDistribution folder. 1.Press Windows Key + R then type services.msc and hit Enter.
2.Right-click on Windows Update service and select Stop.
3.Open File Explorer then navigate to the following location: C:\Windows\SoftwareDistribution 4.Delete all the files and folders under SoftwareDistribution.
5.Again right-click on Windows Update service then select Start.
So, this is the easy and simple way to clear Windows 10 update cache.
Method 13: System Restore Cache
System Restore is a feature in Windows which allows the user to revert their system state’s to that of a previous point in time. This is why System Restore is also known as Recovery tool which can be used to recover from system malfunctions, crashes, and other issues. System Restore does this by using certain restore points where your computer configuration at that point of time is stored under the cache. If your computer has a lot of restore points then the size of the cache file will also be large which would ultimately affect the performance of the system. So System Restore Cache must be cleared from time to time for the proper functioning of the PC. To do so, follow the below steps: 1.Search for System Restore using the search bar and click on the search result.
2.Under the System Protection tab, select the drive whose cache you want to clear.
3.Click on the Configure button.
4.Click on the Delete button.
After completing the above steps, all the cache stored during system restore of the selected drive will be cleared. This will clear all the restore points except the recent one. Recommended:
How to Search for Text or Contents of Any File on Windows 10 7 Best Pirate Bay Alternatives That Work In 2019 (TBP Down) Creating a Full System Image Backup in Windows 10 Dell Vs HP Laptops – Which is a better laptop?
So, by following the above methods, you can easily & quickly clear all types of Caches in Windows 10. But if you still have any queries regarding this tutorial then don’t hesitate to ask them in the comment’s section below.