This gaming platform is user-friendly and free to download & use. It provides various chat options to communicate online with friends and other players. It allows users to install PC games online directly to their cloud after purchase. It is more like an e-store for games. Since CDs and DVDs will be scratched or damaged over time, Steam was bought in to play and purchase games online. You also have the option of gifting or trading collectible items within the community.
How to Fix Steam Not Opening on Windows 10
Here are the reasons why Windows refuses OS to launch Steam client:
How to Fix Steam Not Opening on Windows 10 Method 1: Run Steam as Administrator Method 2: Troubleshoot Internet Connections Method 3: Sync Date & Time Method 4: Restart Steam Process Method 5: Allow Steam Through Windows Firewall Method 6: Delete AppCache Folder Method 7: Run SFC and DISM Scans Method 8: Repair Steam Client Method 9: Free-Up Disk Space Method 10: Update Windows Method 11: Uninstall Conflicting Apps Method 12: Reinstall Steam Client
Damaged installation files Outdated Windows update Server down Damaged system files Network connectivity settings
If Steam app won’t open, then firstly you should check if Steam servers are down at the moment. Go to IsItDownRightNow website and check if Steam servers are running or not.
If the servers are not down then, follow the solutions listed in this guide to fix the problem. Note: Make sure to create a system restore point just as a backup.
Method 1: Run Steam as Administrator
Running an app as an administrator would fix many issues as this would provide all the required permissions needed for the app. Follow the below steps to open Steam as an administrator:
Press the Windows key and type Steam, click the Run as administrator option.
Click Yes in the User Account Control prompt. Check if Steam not opening Windows 10 issue is fixed. If it is, enable this option as follows:
Navigate to C: > Program Files(x86) > Steam or the directory where Steam is installed.
Right-click steam.exe & select Properties, as depicted below.
Switch to the Compatibility tab and check the box marked Run this program as an administrator shown highlighted.
Click Apply > OK to save these changes. Also Read: Change Compatibility Mode for Apps in Windows 10
Method 2: Troubleshoot Internet Connections
Steam allows you to play offline games even if you have no internet connection. But a few settings in network connectivity may restrict the app from opening resulting in Steam not opening on Windows 10 issue:
Press Windows + I keys simultaneously to launch Settings.
Click on the Update & Security tile, as shown.
Go to Troubleshoot menu from the left pane.
Select Internet Connections and click on the Run the troubleshooter button as highlighted below.
Choose the Troubleshoot my connection to the Internet option.
Wait for the troubleshooter to detect problems.
Follow on-screen instructions to fix the issue. Once the process is complete, restart your PC.
Method 3: Sync Date & Time
An incorrect configuration of date and time settings may also result in Steam app won’t open issue. Follow the below steps to correct it:
Right-click on the time and date section on the Taskbar.
Select the Adjust date/time option from the list.
Switch On the toggle for the given options:
Set time automatically Set time zone automatically
Also Read: Fix Steam Error Code e502 l3 in Windows 10
Method 4: Restart Steam Process
Even after closing the Steam client on your computer, the app might still be running in the background. Hence, follow the given steps to disable Steam processes to fix Steam not opening on Windows 10 issue:
Hit the Ctrl + Shift + Esc keys simultaneously to open Task Manager.
Select the Steam app process and click on End task button, shown highlighted.
Now, restart your PC and run the Steam app as administrator.
Method 5: Allow Steam Through Windows Firewall
Any changes or conflicts with the firewall settings might also cause this issue. Thus, follow the below steps to add Steam as an exception in Windows Defender Firewall:
Hit the Windows key, type Control Panel in the Windows Search bar, and click Open.
Set View by: > Large icons and click on Windows Defender Firewall to continue.
Next, click on Allow an app or feature through Windows Defender Firewall.
4A. Search and allow Steam through the Firewall by ticking the checkboxes marked Private and Public.
4B. Alternatively, you can click on Change Settings, then Allow another app… button to browse and add the Steam app to the list. Then, check the boxes corresponding to it. 5. Finally, click OK to save the changes. Now, open the Steam app as administrator and check if the issue of fixed. Also Read: How to Disable Windows 10 Firewall
Method 6: Delete AppCache Folder
This folder contains cache information about the games and applications. Deleting it will give the app a hard refresh. Note: Once you launch the Steam app, the app cache will be created automatically.
Press Windows + E keys together to open File Explorer
Navigate to the location where you installed Steam: C:\Program Files (x86)\Steam Note: If you are not sure, read our guide: Where are Steam Games installed? here.
Right-click on the appcache folder and choose the Delete option as shown.
Now, restart your PC and launch Steam as administrator again. Also Read: How to Play Steam Games from Kodi
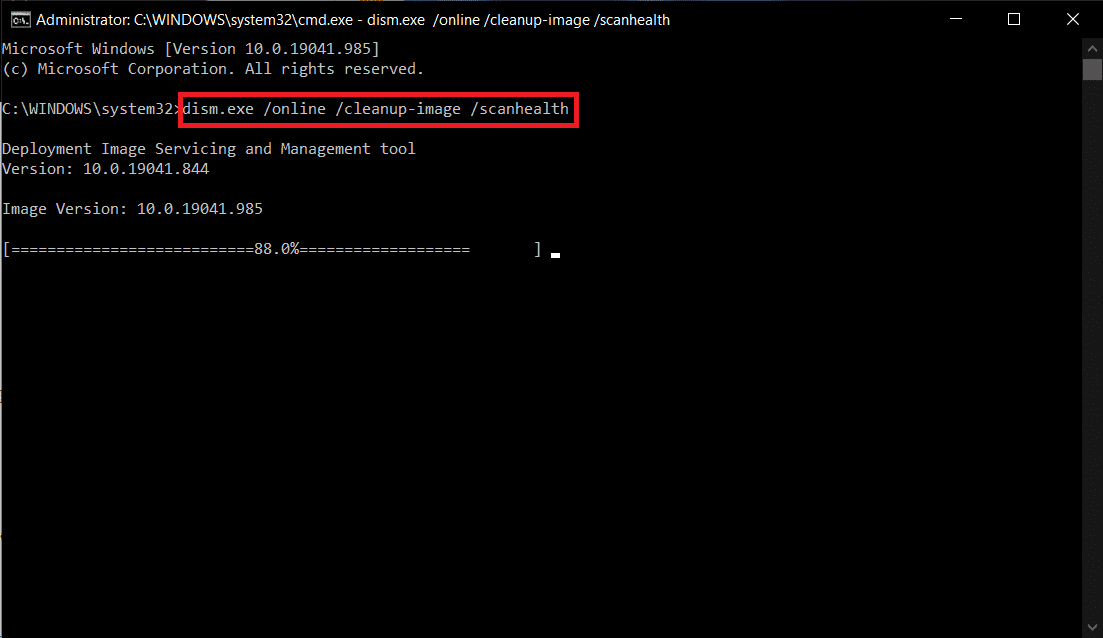
Method 7: Run SFC and DISM Scans
Corrupt operating system files may also cause Steam app won’t open issue on your device. Windows has an in-built tool to repair system files viz SFC & DISM which can be run as explained below:
Hit the Windows key, type Command Prompt and click on Run as administrator.
Click on Yes in the User Account Control prompt.
Type sfc /scannow and press Enter key to run System File Checker scan.
Note: A system scan will be initiated and it will take a couple of minutes to finish. Meanwhile, you can continue performing other activities but be mindful of not accidentally closing the window. After completing the scan, it will show either of these messages:
Windows Resource Protection did not find any integrity violations. Windows Resource Protection could not perform the requested operation. Windows Resource Protection found corrupt files and successfully repaired them. Windows Resource Protection found corrupt files but was unable to fix some of them.
- Once the scan is finished, restart your PC.
- Again, launch Command Prompt as administrator and execute the given commands one after the other: Note: You must have a working internet connection to execute DISM commands properly.
Method 8: Repair Steam Client
Alternately, use Windows PowerShell to repair Steam client as follows:
Press the Windows key, type windows powershell and click on Run as administrator.
Click Yes in the User Account Control prompt.
Type the following command and hit Enter key. “C:\Program Files (x86)\Steam\bin\SteamService.exe” /repair Note: If your Steam file is placed in another location, you need to enter that directory instead. Read our guide: Where are Steam Games installed? here.
Once the repair completed message is displayed, restart your PC. Also Read: How to Change Steam Profile Picture
Method 9: Free-Up Disk Space
Since Steam is an online tool, it needs free disk space to function perfectly. You can easily free up the disk without uninstalling third-party apps and possibly, fix Steam not working issue.
Launch File Explorer and go to This PC.
Here, right-click on the drive (C:) where Steam is installed and select Properties as depicted.
In the General tab, click on the Disk Cleanup button.
A prompt will appear and The Disk Cleanup will calculate the amount of space that can be made free.
Check the box for all desired items under Files to delete: and click Clean up system files.
Once the scanning is complete, again check the boxes for all the chosen items and click on OK.
Finally, click on the Delete Files button in the confirmation prompt.
Restart your PC. To clean up additional space, read 10 Ways to Free up Hard Disk Space.
Method 10: Update Windows
Updating Windows would greatly help in fixing most issues.
Navigate to Windows Security > Update & Security as earlier.
In the Windows Update tab, click on Check for updates button.
3A. If a new update is available, then click Install Now and restart your PC.
3B. Otherwise, if the Windows is up-to-date, then it will show You’re up to date message.
Also Read: How to Add Microsoft Games to Steam
Method 11: Uninstall Conflicting Apps
A recently installed software on your device may also cause this issue. Follow the below steps to uninstall recent software that is creating the issue of Steam not opening in Windows 10:
Hit the Windows key, type apps and features, and click on Open.
Here, click on Sort by drop-down and choose Install date as depicted below.
Click on the recent software installed (e.g. Microsoft SQL Server Management Studio) and select Uninstall option, as depicted below.
Again click on Uninstall to confirm.
Repeat the same for all such apps and Restart your PC.
Method 12: Reinstall Steam Client
Reinstalling the Steam app might resolve the Steam not opening on Windows 10 issue if the app isn’t working normally. The latest version of the app gets installed while reinstalling, which would greatly improve its performance.
Launch Apps & features from the Windows search bar as shown.
Select Steam and click on the Uninstall button shown highlighted.
Again, click on Uninstall to confirm.
In the Steam Uninstall window, click on Uninstall to remove Steam.
Then, restart your Windows PC.
Download the latest version of Steam from your web browser, as shown.
After downloading, run the downloaded SteamSetup.exe file by double-clicking on it.
In the Steam Setup wizard, click on the Next button.
Choose the Destination folder by using the Browse… option or keep the default option. Then, click on Install, as depicted below.
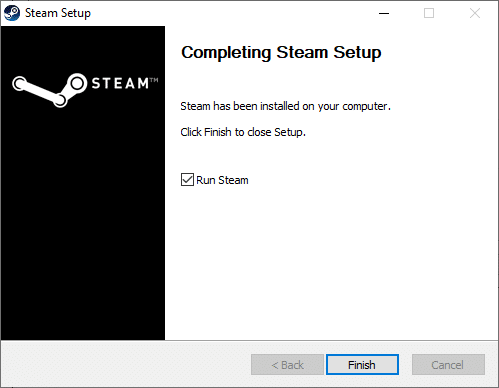
Wait for the installation to be completed and click on Finish, as shown.
Q1. Will updating graphic drivers solve the issue of Steam app won’t open? Ans. Yes, updating the graphic drivers may also resolve your Steam not opening Windows 10 issue. Recommended:
How to Disable Wakeup Password in Windows 11 How to Fix The Audio Service is Not Running Windows 10 How to Fix Xbox One Keeps Signing Me Out How to Set TF2 Launch Options Resolution
We hope that this guide would have helped you to fix Steam not opening Windows 10 issue. Let us know which method worked for you. Feel free to drop your queries and suggestions in the comment section below.


![]()