An easy way to confirm hard drive corruption is running a Pre-boot System Analysis (PSA) diagnostics test that is provided by most manufacturers. The ePSA or the Enhanced Pre-boot System Analysis test available on Dell computers checks all connected hardware to the system and includes sub-tests for memory, hard drive, fan and other input devices, etc. To run an ePSA test on your Dell system, restart your computer/laptop and keep pressing the F12 key until you enter the One-time boot menu. Finally, highlight Diagnostics and press enter. Users performing an ePSA test often run into an error or two indicating disk failure/crash. The most common one is ‘Error Code 0142’ or ‘MSG: Error Code 2000-0142’.
If you are one of the unlucky Dell users that ran to the 2000-0142 diagnostic error, then you have come to the right place. In this article, we will be explaining the likely reasons for the said error and give you a couple of methods to fix Dell Diagnostic error 2000-0142 error. What causes the Dell Diagnostic Error 2000-0142? The ePSA diagnostic error code 2000-0142 implies that the hard disk drive (HDD) self-test was unsuccessful. In layman’s terms, the 2000-0142 error code means that the test failed to read information off your computer’s hard disk drive. Since there is trouble reading from the HDD, your computer may not start or will at least have some trouble booting up. The three most common reasons for the 2000-0142 diagnostic error are:
Loose or incorrect SATA connections: SATA cables are used to connect your hard drive to your motherboard. An incorrect connection or a faulty/damaged cable will cause errors in reading data off your hard drive and therefore lead to the 2000-0142 error. Corrupt MBR: Hard drives store data on a platter surface which is divided into pie-shaped sectors and concentric tracks. The Master Boot Record (MBR) is the information contained in the very first sector of an HDD and it holds the location of the operating system. A corrupt MBR implies the PC can’t locate the OS and as a result, your computer will have difficulty or won’t boot up at all. Mechanical Damage: Damage in the form of a broken read-write head, spindle malfunction, cracked platter or any other damage to your hard drive can lead to the 2000-0142 error as data cannot be read.
How to fix Diagnostic Error 2000-0142?
9 out of 10 times, the arrival of the diagnostic error 2000-0142 suggests that your hard drive is nearing its end. So it is important for users to backup their data to avoid losing any of it whenever the dreaded day arrives. Below are a few methods that you can use to salvage your data from a terminal hard drive (repairing MBR and reinstalling Windows OS) and finally, what steps you should take in case the hard drive has already stopped working (replacing the HDD).
How to fix Diagnostic Error 2000-0142? Method 1: Check SATA cables Method 2: Perform a ‘Disk Check’ in the command prompt to repair MBR Method 3: Fix boot and rebuild BCD Method 4: Use MiniTool Partition Wizard to Backup Data and Repair MBR Method 5: Reinstall Windows Method 6: Replace your Hard Drive Disk
Method 1: Check SATA cables
Before moving forward to the more advanced methods, we will first ensure that the problem isn’t caused due to IDE or SATA cables. Open up your computer and unplug the cables connecting the hard drive to the motherboard. Slightly blow wind into the connecting ends of the cable to get rid of any dirt that might be clogging the connection. Plug the cables and the hard drive back in, perform an ePSA test, and check if 2000-0142 the error still persists. You should also try using the SATA cables to connect another hard drive or connect the suspected hard drive into another system to pinpoint the cause of the error. If you have another set of SATA cables available, try using them to connect the hard drive and make sure what’s the root cause.
Method 2: Perform a ‘Disk Check’ in the command prompt to repair MBR
As mentioned earlier, the information about the location of your operating system is stored in the Master Boot Record and it helps the computer know where to load the OS from. If the issue is caused due to a corrupted MBR, this method will help you recover any data. If this works, we recommend that you backup your data to a brand new hard drive immediately, since the error you experienced indicates an approaching disk failure. You will need a bootable Windows disk to continue with this method – How to Create Windows 10 Bootable USB Flash Drive
Before you start the computer, insert the Windows installation disc in the disc drive.
Once you see the prompt, press the required key. Alternatively, on startup, press F8 and choose DVD drive from the boot menu.
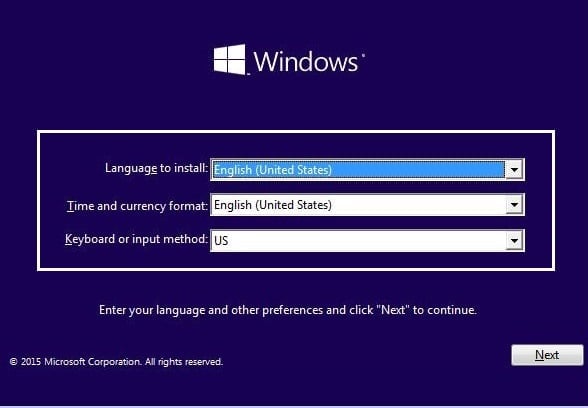
One by one, select the language to install, time and currency format, and Keyboard or input method, then click on ‘Next’.
An ‘Install Windows’ window will pop up, click on ‘Repair your computer’.
In the ‘System Recovery Options’, select the operating system that you want to repair. Once it is highlighted, click on ‘Next’.
In the following dialogue box, choose the ‘Command Prompt’ as the recovery tool.
Once the Command Prompt window opens up, type ‘chkdsk /f /r’ and press enter. This will fix any bad sectors on the hard drive platter and repair the corrupt data.
Once the process ends, remove the Windows installation disc and switch on your computer. Check if the Dell Diagnostic Error 2000-0142 is still persisting or not. Also Read: Does Quest Diagnostics Take Walk Ins?
Method 3: Fix boot and rebuild BCD
Open Command prompt and type the following commands one by one & hit enter:
After completing each command successfully type exit.
Restart your PC to see if you boot to windows.
If you get an error in the above method then try this: bootsect /ntfs60 C: (replace the drive letter with your boot drive letter)
And again try the above commands which failed earlier. Also Read: 7 Ways to Fix Dell Touchpad Not Working
Method 4: Use MiniTool Partition Wizard to Backup Data and Repair MBR
Similar to the previous method, we will be creating a bootable USB or disc drive to help us retrieve data from the corrupt hard drive. Although, instead of creating a bootable Windows drive, we will be creating a bootable media drive for MiniTool Partition Wizard. The application is a partition management software for hard drives and is widely used for various hard drive related activities.
- You will first need to find a computer running on the same OS as the problematic computer containing the corrupt hard drive. Connect an empty USB drive to the working computer.
- Now, head over to Best Free Partition Manager for Windows | MiniTool Partition Wizard Free, download and install the required software on the working computer.
- Once installed, launch the application and click on the Bootable Media feature present at the top right corner to make a bootable media drive. Unplug the USB drive once the bootable media drive is ready and plug it into the other computer.
- When prompted, tap the required key to enter the BIOS menu and select the plugged in USB drive to boot from.
- In the MiniTool PE Loader screen, click on Partition Wizard at the top of the list. This will launch the main user interface of MiniTool Partition Wizard.
- Click on Data Recovery in the toolbar.
- In the following Data Recovery window, select the partition from which data is to be recovered and click on Scan.
- Select the files you would like to recover and click on the Save button. Also, save the required files in a separate external hard drive or USB drive. While we have the MiniTool Partition Wizard open, we can also try to repair the MBR through it. The process is simpler than the first method and only takes a few clicks.
- Start by selecting the system disk in the Disk Map and then click on the Rebuild MBR option present in the left panel under Check disk.
- Click on the Apply option at the top of the windows to start rebuilding. Once the application finishes rebuilding the MBR, perform a surface test to check for any bad sectors on the hard drive platter. Select the hard drive that you just rebuild the MBR for and click on the Surface test in the left panel. On the following screen, click on Start Now. It’s likely that the results window will display both green and red squares. Red squares imply that there are a few bad sectors. To repair them, open Command Console of MiniTool Partition Wizard, type chkdsk/f/r and press enter.
Method 5: Reinstall Windows
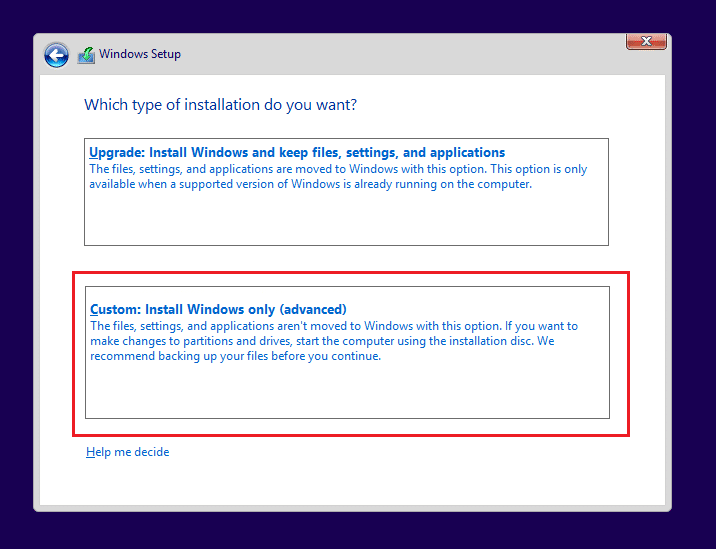
If both the above methods failed, you should consider reinstalling windows. It may sound extreme at first but the process is not difficult at all. It can also help when your Windows is misbehaving or running slow. Reinstalling Windows will also correct any corrupt windows files and a corrupt or missing Master Boot Record data. Before you start the reinstallation process, make sure you have all your important files backed up as reinstalling the OS formats all your existing data. You will require a PC with a strong internet connection and a USB flash drive with at least 8GB of free space. Follow the steps to do a clean installation of Windows 10 and plug the bootable USB drive in the computer on which you wish to reinstall windows. Boot from the connected USB and follow the on-screen prompts to reinstall Windows.
Method 6: Replace your Hard Drive Disk
If neither performing a disk checkup nor reinstalling windows worked for you, your disk may be experiencing permanent failure and needs replacement. If your system is under warranty, Dell’s support will replace the drive free of cost once you contact and inform them about this error. To check if your system is under warranty, visit Warranty & Contracts. If not, you can do it yourself. The hard disk replacement process is easy but it differs from model to model, a simple internet search will let you know how to replace yours. You will need to buy a hard drive, we recommend that you buy a Solid State Drive (SSD) instead of a Hard Disk Drive (HDD). HDDs have moving heads and spinning platters, which makes them more prone to failure, usually after 3 to 5 years of use. Moreover, SSDs boast higher performance and may improve your computer’s experience.
Before you start the replacement process, make sure all your data is properly backed up. Remember to disconnect any telephone cables, USB cables, or networks from your system. Also, unplug the power cord. Recommended: How to Change the Primary & Secondary Monitor on Windows We hope you were able to fix Dell Diagnostic Error 2000-0142 on your system without losing any important data!


