How to Fix Service Error 1053 on Windows 10
Error 1053: The service did not respond to the start or control request in a timely fashion occurs in Windows 10 whenever there is a timeout response for a particular request.
How to Fix Service Error 1053 on Windows 10 Method 1: Perform Clean Boot Method 2: Tweak Timeout Settings Method 3: Repair System Files Method 4: Run Malware Scan Method 5: Reset Network Configurations Method 6: Change Ownership of Application Method 7: Update Windows Method 8: Reinstall Apps
If your applications or services do not meet Timeout settings’ default preferences, you will face service error 1053. Tweaking registry keys could manipulate the settings, thereby fixing the problem. If your PC does not have the essential DLL & System data files, you may face service error 1053. Corrupt or altered files, and whenever a vital data piece is unavailable, you will face service error 1053. The presence of malware may lead to the loss of data, thereby causing service error 1053. Running an antivirus scan might demolish all the harmful data from your PC and prevent your data from being altered or damaged. Affected system files could be due to a corrupt Windows update. If you have an outdated Operating System, corrupt data and bugs (if any) will stay back in your PC, causing service error 1053. Always ensure you are using an updated version of Windows to resolve any kind of issue. If there are corrupt installation files, incorrect configuration of files & folders, issues in admin rights of apps might cause service error 1053. To resolve this, reinstall any particular application causing the error.
Still, if you are confused about procedures to be followed to eradicate Error 1053: The service did not respond to the start or control request in a timely fashion, you are not alone! Follow the troubleshooting methods to fix the said error as discussed in the next section. This section has compiled a complete list of methods to fix error 1053: the service did not respond. Make sure you follow the listed methods in the same order to attain the best results.
Method 1: Perform Clean Boot
Issues concerning error 1053: the service did not respond and can be fixed by a clean boot of all essential services and files in your Windows 10 system, as explained in this method. Note: Make sure you log in as an administrator to perform Windows clean boot.
Launch the Run dialog box by hitting the Windows + R keys together.
Type msconfig and click the OK button to open System Configuration.
The System Configuration window will appear. Next, switch to the Services tab.
Check the box next to Hide all Microsoft services and click on Disable all button as shown highlighted.
Now, switch to the Startup tab and click the link to Open Task Manager as depicted below.
The Task Manager window will now pop up. Switch to the Startup tab.
Next, select the startup tasks that are not required and click Disable displayed in the bottom right corner.
Exit the Task Manager and System Configuration window.
Now, press Alt+ F4 keys simultaneously. You will see a pop-up window as shown below.
Now, click on the drop-down box and select the Restart option.
Finally, hit Enter or click on OK to reboot your system.
Method 2: Tweak Timeout Settings
To resolve service error 1053, the primary step is to alter the timeout settings via Registry editor. Whenever you try to start a service, a time frame will start of its own with default values. If the response time does not meet this time frame, you will face Error 1053: The service did not respond to the start or control request in a timely fashion. Now, in this troubleshooting method, you can change the registry value of the time frame and if it is not present, you will create the same. Here is how to do it.
Press and hold Windows + R keys together to open the Run dialog box.
Now type regedit and hit Enter key to launch Registry Editor.
Navigate to the following key folder path from the address bar. 4A. If you did not find SecurePipeServers in the Control folder, right-click on the space in the right pane and click on New > DWORD (32-bit) Value.
4B. If you have SecurePipeServers in the Control folder, right-click on the Default key in the right pane and select the Modify option. 5. Set the Value data to 18000 as shown.
- Save the changes and reboot the PC. Now check if you have fixed Error 1053: The service did not respond to the start or control request in a timely fashion. Also Read: Fix Device Not Migrated Error on Windows 10
Method 3: Repair System Files
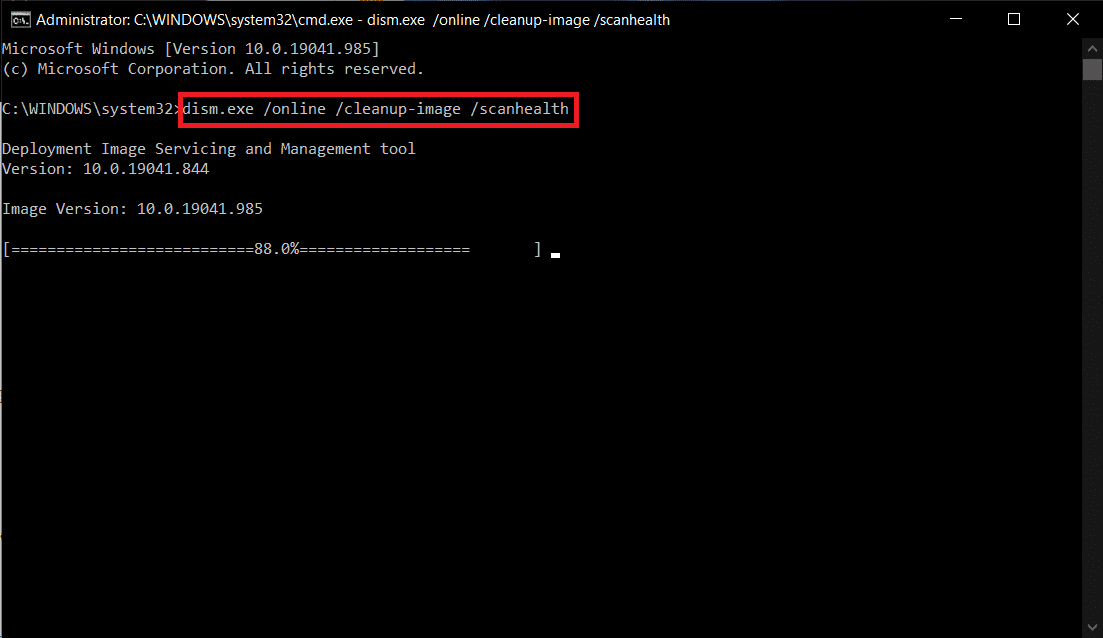
Corrupt files and folders in PC often lead to service error 1053. Analyze if your PC has any corrupt files contributing to the error by SFC, DISM commands as instructed in this method. As a result, if there are any discrepancies, all the corrupt files will be automatically removed or replaced. In addition, it is a built-in tool that lets the user delete files and fix service error 1053. Also, follow the below-mentioned steps to implement the same.
Hit the Windows key, type Command Prompt and click on Run as administrator.
Click on Yes in the User Account Control prompt.
Type chkdsk C: /f /r /x command and hit Enter key.
If you are prompted with a message, Chkdsk cannot run…the volume is… in use process, then, type Y and hit the Enter key.
Again, type the command: sfc /scannow and press Enter key to run the System File Checker scan.
Note: A system scan will be initiated and it will take a couple of minutes to finish. Meanwhile, you can continue performing other activities but be mindful of not accidentally closing the window. After completing the scan, it will show either of these messages:
Windows Resource Protection did not find any integrity violations. Windows Resource Protection could not perform the requested operation. Windows Resource Protection found corrupt files and successfully repaired them. Windows Resource Protection found corrupt files but was unable to fix some of them.
- Once the scan is finished, restart your PC.
- Again, launch Command Prompt as administrator and execute the given commands one after the other: Note: You must have a working internet connection to execute DISM commands properly.
Method 4: Run Malware Scan
Windows Defender can help you in getting rid of malicious software. It routinely scans and safeguards your system. Therefore, to avoid service error 1053, run an antivirus scan in your system and check if the problem is solved. Then, follow the below-mentioned steps to do so.
Hit Windows + I keys simultaneously to launch Settings.
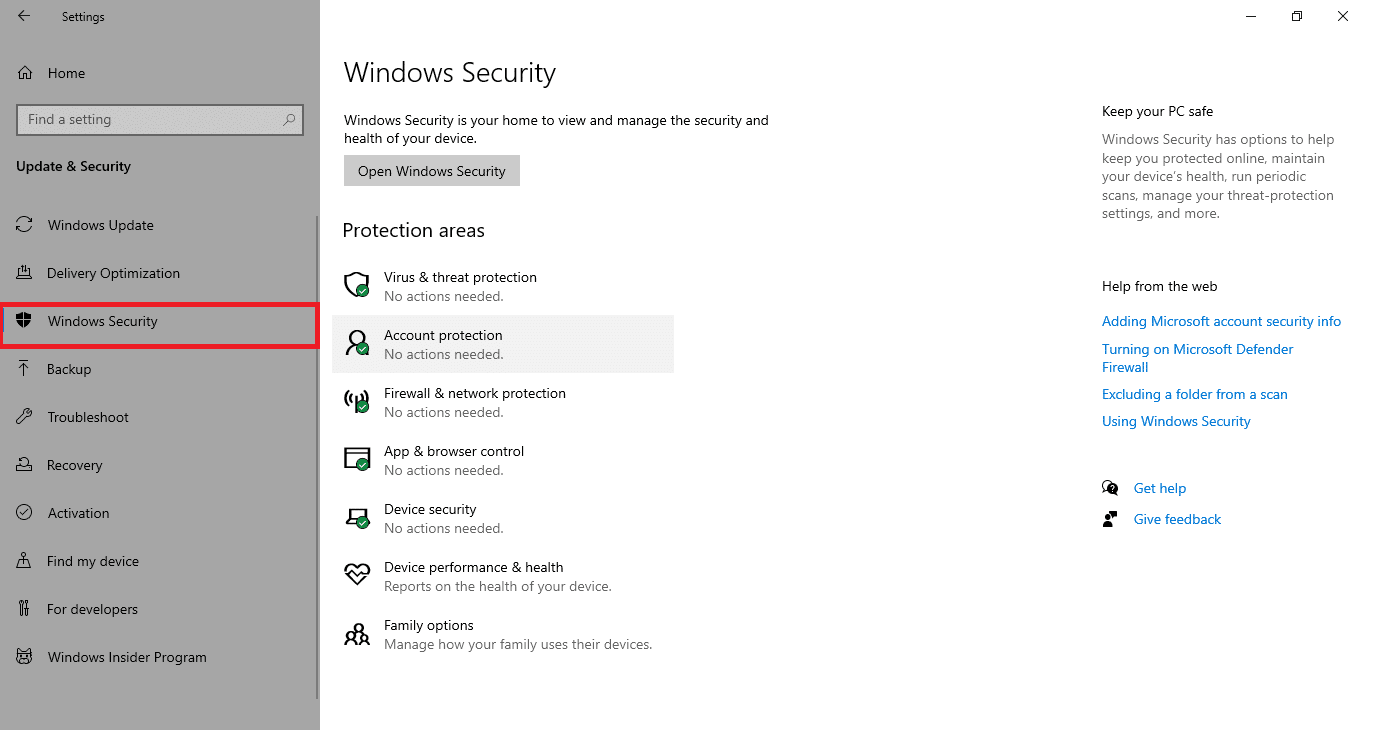
Here, click on Update & Security settings as shown.
Go to Windows Security in the left pane.
Click on the Virus & threat protection option in the right pane.
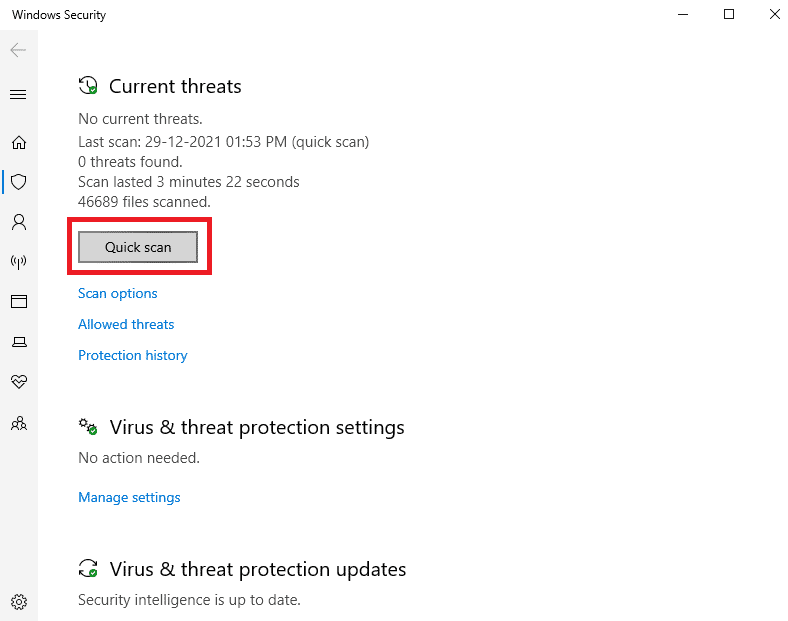
Click on the Quick Scan button to search for malware.
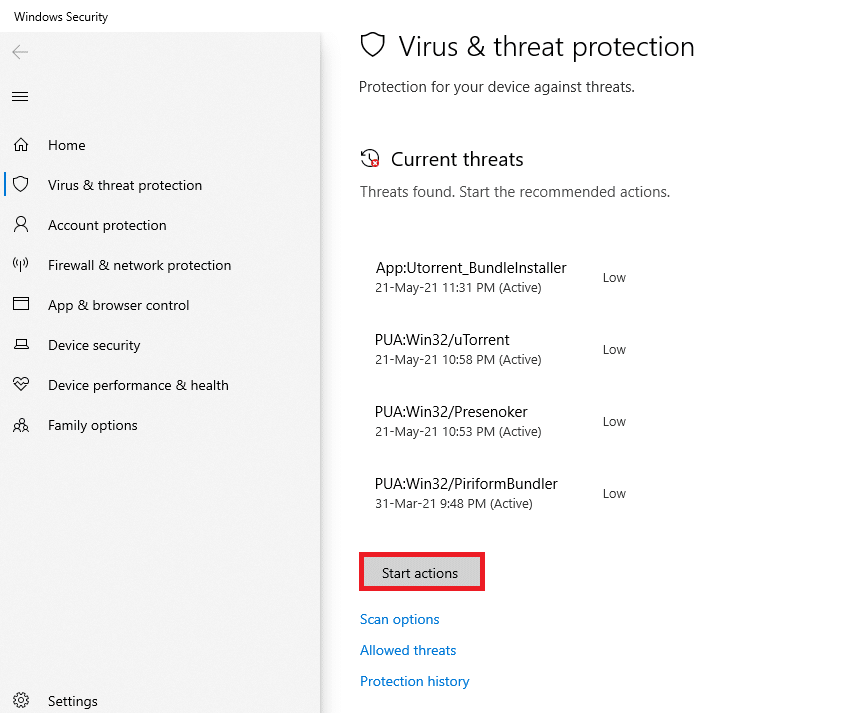
6A. Once the scan is done, all the threats will be displayed. Click on Start Actions under Current threats.
6B. If there is no threat in your device, the device will show the No current threats alert.
Windows Defender will remove all viruses and malware programs once the scanning process is complete. First, check if you have fixed error 1053: the service did not respond. Also Read: How to Fix Error 0x80300024
Method 5: Reset Network Configurations
If you are trying to start a service that connects to the internet for its function, you may try to reset network configurations to fix error 1053: the service did not respond. In some cases, internet connectivity problems might contribute to the said error, and thus resetting them might help you fix the same. Here are a few instructions to reset network configurations.
Hit the Windows key, type Command Prompt, and click on Run as administrator.
Now, type the following commands one by one in the command window and hit Enter after each command.
Finally, wait for the commands to be executed and reboot your PC. Check if you have fixed Error 1053: The service did not respond to the start or control request in a timely fashion. Also Read: Fix Failed to Enumerate Objects in the Container error on Windows 10
Method 6: Change Ownership of Application
This is a rare case where you might face Error 1053: The service did not respond to the start or control request in a timely fashion when you do not have proper ownership of any particular application. If you do not have all the elevated accesses to the application, you will not be able to read a response from a (system) service or send a response to a (system) service. This contributes to error 1053: the service did not respond. You can get rid of the error by changing the ownership of the application as follows.
Find the application causing the error and navigate to its installation location. Right-click on the file/folder and select Properties.
Now, switch to the Security tab and select the Advanced option as highlighted below.
Now, click on the Change option as shown.
Now, type the user account name in Enter the object name to select field and select the Check Names option as highlighted. Once you have found your account, click on OK.
Note: When you could not find your account name on the list, manually select it from the user groups list. To do this, click on the Advanced option followed by Find Now. Then, choose your account from the list and click on OK. 5. Now, check the following boxes in the preceding window, and click on Apply»OK to save the changes.
Replace owner on subcontainers and objects Replace all child object permission entries with inheritable permission entries from this object
Click on Yes to proceed with the Windows Security prompt.
Again, click on OK to proceed as depicted.
Close the existing window and navigate to the Properties window. In the Security tab, click on the Advanced option as highlighted.
Here, in the Permissions tab, click on Add as highlighted.
In the next window, click on Select a principal as shown.
Now, type the user account name in Enter the object name to select field and select the Check Names option as you did earlier, and click on OK.
Now, check all the boxes under Basic permissions as shown and click on OK.
Now, check the Replace all child object permission entries with inheritable permission entries from this object box in the preceding window.
Click on Apply > OK to save the changes and close all the windows, reboot your PC. Check if this fixes service error 1053 for you. Also Read: How to Fix Error Code 0x80004005
Method 7: Update Windows
Installing new updates will help you to fix the bugs in your system. Hence, always ensure that you are using your system in its updated version. Otherwise, the files in the system will not be compatible with the service files leading to error 1053: the service did not respond. Follow the steps mentioned below to update Windows to the latest version.
Press Windows + I keys simultaneously to launch Settings.
Click on the Update & Security tile, as shown.
In the Windows Update tab, click on Check for updates button.
4A. If a new update is available, then click Install Now and follow the instructions to update.
4B. Otherwise, if the Windows is up-to-date, then it will show You’re up to date message.
Method 8: Reinstall Apps
The last chance to fix the problem is reinstalling the particular application, which throws the error 1053. However, if you install any third-party applications excluding those from the MS store, chances of missing or corrupt components will lead to the said problem. Hence, you may not be responded to your request for the corresponding Windows services. Therefore, uninstall the application from your PC and re-download the latest version of it from its official site.
Launch the Run dialog box and type appwiz.cpl. Then, click on OK.
In Programs and Features window, search for your application.
Now, click on Application and select Uninstall option.
Now, confirm the Are you sure want to uninstall Application? prompt by clicking Yes.
Restart your computer once you have completed all the steps mentioned above. Then, reinstall the app from its respective official site and check if you have fixed the issue. Recommended:
Fix Google Chrome STATUS BREAKPOINT Error Fix 0x80004002: No Such Interface Supported on Windows 10 Fix The Feature You Are Trying to Use is on a Network Resource That is Unavailable Fix Square Enix Error Code i2501
We hope that this guide was helpful and you could fix service error 1053 on Windows 10. Let us know which method worked for you the best. Also, if you have any queries/suggestions regarding this article, then feel free to drop them in the comments section.